
Home made Dal Maharani or Dal Makhani has been a staple at our place for about a year now. While it’s certainly not the prettiest dish out there it really is delicious. We used to order it regularly from an Indian restaurant in the West Village but once we moved to Brooklyn we found it really tough to find one that was just as good. So I decided to do some research on exactly what went into making this dish. I have to admit once I found some recipes online I was a little put off. There seemed to be so much preparation necessary and so many concepts that seemed so foreign. For example, do you know what goes into making ginger garlic paste? Have you ever used a pressure cooker? Where can you find ghee? Should you use cream or substitute with yogurt for a healthier alternative? What the heck is onion puree? With a little encouragement, some Amazon purchases, a trip to an Indian specialty food store, a few youtube instructional videos and some trial and error I’m proud to say that I can make some mean home made Dal Maharani that will put your local Indian restaurant to shame! I hope you find this information useful and decide to give vegetarian Indian cooking a try. I have to say a big thank you to Aditi at Eat East Indian. It was her video that gave me the confidence to take the plunge and try making this Dal recipe at home. You can find the link to the video here. Now let me tell you more about how to make Dal Maharani.
First things first. Let’s talk pressure cookers. Aditi uses a pressure cooker in her recipe. Instead of trying to find an alternative to pressure cooking I decided (as I always do) that if you’re going to try a recipe out, do it right. No alternatives and no substitutions. So, off I went on the pressure cooker hunt. There were a lot of models to choose from and not really knowing much about pressure cooking I decided to buy a highly rated product from Amazon. Little did I realize that not all pressure cookers are created equally. You see, an Indian pressure cooker actually whistles when the pressure gets released and the recipe talks about waiting for whistles. What I didn’t realize was that I’d purchased a Western pressure cooker that does not whistle. Can you picture me scratching my head wondering when this thing was going to whistle or explode in my face? I persevered, did some research and found that a whistle equated to roughly 5 minutes of time. Unfortunately there were other issues with my cooker not having a perfect seal that led me to discard my first buy and opt for a traditional Indian pressure cooker. These gadgets are really not that expensive so the barrier to entry here is low. We’re talking roughly $25 for a 3-4 litre cooker which is a perfectly adequate size for this recipe. Getting the right gadget is really only the first hurdle here. These cookers aren’t the easiest things to use. They’re not just some electronic gadget where you press a bunch of buttons and walk away. You kind of have to know what’s going on. For example, when to put the valve on, what the right heat level should be, when is it ok to open it up, what’s happening when it whistles. But it’s not that difficult. Just read the old school 1970’s instructions and all will be explained.
Ok. Now for the ingredients. Ghee is clarified butter. It can be stored in your cupboard and has a relatively long shelf life. You can buy it along with other Indian ingredients at an Indian specialty food store or online. Luckily, just one stop off the L train from Brooklyn into Manhattan is the Dual specialty food store. Here you can find Ghee (made in the USA), Black urad whole dal, cinammon sticks, garam masala and many other things. The prices are reasonable and you can really stock up at this place. The smell is amazing and it’s a fun little adventure discovering spices and ingredients you never knew existed.
You’re also going to need to know how to make ginger garlic paste. I think you can buy it at Dual but I prefer to make it. Here’s what you do.
- Put 1/2 cup ginger cut up into chunks into a food processor with 1/2 cup garlic cloves
- Add 1/4 cup canola oil
- Pulse until it makes a smooth paste.
That’s it! You’re done. I scoop the leftover paste into an ice cube tray, roughly 1 tablespoon per cube and freeze. Whenever you need a tablespoon of paste just grab it from the freezer and thaw for your recipe. Pretty easy huh?
Lastly there’s onion puree. I found weird videos online that talk about boiling the onions first before using them to make a puree but then after consulting with some experts (you know who you are) I was told you just take an onion and puree in a food processor and you’re done. For this recipe I pureed 1 onion with 1 cut up green chili (jalapeno or serrano is fine). I use the green chili with seeds but if you’re worried about it being too spicy you can always remove the seeds.
Let’s get down to it. Here’s what you need to do to make your home made Dal Maharani. Adapted from eat east indian youtube video.
Ingredients:
- 3/4 cup black urad whole dal
- 1/2 cup red kidney beans
- 3 tsp salt
- 1 tsp turmeric
- 1 tsp red chili powder
- 1 cinammon stick
- 1 bay leaf
- 2 cloves
- 1 tbsp ginger garlic paste (see above)
- puree of 1 onion and 1 green chili
- 3 pureed tomatoes
- 1 tsp cumin powder
- 1 tsp coriander powder
- 1 cup heavy cream (you can substitute with yogurt for a healthier alternative but try cream first!)
- 1.5 tsp garam masala divided into 1 tsp and 1/2 tsp
- 1/2 tsp black pepper powder
- oil for cooking (vegetable, canola or grapeseed is fine)
- 1 tbsp ghee (optional)
- cilantro for garnish
Here’s a nice display of the ingredients. Pretty huh?

Method:
Soak the lentils and beans in 3 cups of water for about an hour. Aditi says 1 hour but I think 2-3 hours would be better.
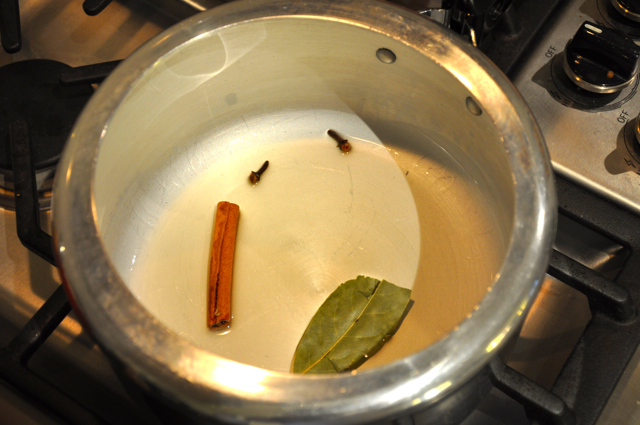
Put 2 tablespoons of oil and 1 tbsp ghee in your pressure cooker and heat on medium heat until melted and the oil is hot.
Add the cinnamon stick, bay leaf and 2 cloves and let them fry for 1 minute.
Then add pureed onion/green chili mix.
Add salt, turmeric and chili powder to the mix and stir to combine.

Cook the onion and spice mix till the onion mix changes color, going darker brown, water has dried up, the onion has started to reduce in quantity and oil begins to ooze out of the onions. Stir occasionally. This will take 5-10 minutes.

Add the ginger garlic paste, continuing to sitr the mixture another 1-2 minutes.
Then add cumin and coriander continuing to stir for another 2 minutes. The color should have changed more and be even darker.
Add the tomato pruee and cook for 5-6 more minutes continuing to stir.
Add 1 tsp garam masala
Add lentils and beans including the water they were soaked in and stir it all together. Add 1 more cup of water. Sometimes I add 1/2 cup of water if I think it’s looking too liquidy. But remember you need a fair amount of water in your pressure cooker for it to work correctly.

Close the lid of your pressure cooker.


Wait for steam to start coming out of the cooker then place your valve over the steam vent and wait for a whistle. Here’s some video just in case you’re wondering what the whistle sounds like. I got a bit of a shock for my first whistle 🙂
After 1 whistle, reduce the heat to more of a lower medium heat. Wait for 3-4 more whistles (about 20 minutes) and then turn off the heat completely.
Wait for the pressure cooker to cool down (10 minutes?) and then open the lid.
Give everything a good stir. Give it a taste. If the red beans still seem firm, turn on the heat and cook down for a little longer, perhaps another 5 minutes.
Add the 1 cup of cream, 1/2 tsp garam masala and 1/2 tsp ground pepper.
Stir through and add some cilantro leaves.
Garnish with more cilantro if you like and enjoy!
Food storage tip – This recipe makes a bunch of dal, approx 6 portions. Once it’s cooled down a little, store the dal in containers and then freeze. The dal makes a perfect and quick weeknight dinner.
