
On the last weekend of September this year I think everyone in all of NYC decided it was the perfect weekend to go apple picking. The weather was lovely and the zipcars were just begging to be booked out and taken on mini road trips to all the little farms and orchards around New York and New Jersey. We headed over to fishkill farms based on the recommendations of a friend and also because they are pet friendly. It’s always nice to take the dog out of town with us so he can roll around in the grass and smell all those interesting smells. The farm was great. Not too big or too small with plenty of apples to pick. We got there relatively early so it wasn’t too crowded either. A map was provided and everything was well laid out and easily accessible. I’d never been apple picking before so I wasn’t sure what to expect. Here are a couple of things I learnt:
- There are lots of rotting apples on the ground. Be prepared to dodge them as you are picking. Luckily our dog didn’t really take much notice of them.
- Unless you need 10 bags of apples, apple picking is a relatively quick activity. You don’t need to plan to spend more than an hour or two over at the orchard. Maybe bring a packed lunch and have a picnic when you’re done. The shop at fishkill is quite lovely too. It’s always nice to pick up some super fresh produce.
- It’s such a nice feeling to actually pick the fruit off the tree, appreciate where things come from or how much energy has had to go into growing it. People always talk about stuff like that and I would think “That’s nice” but now I feel like I “get it” just a little more.
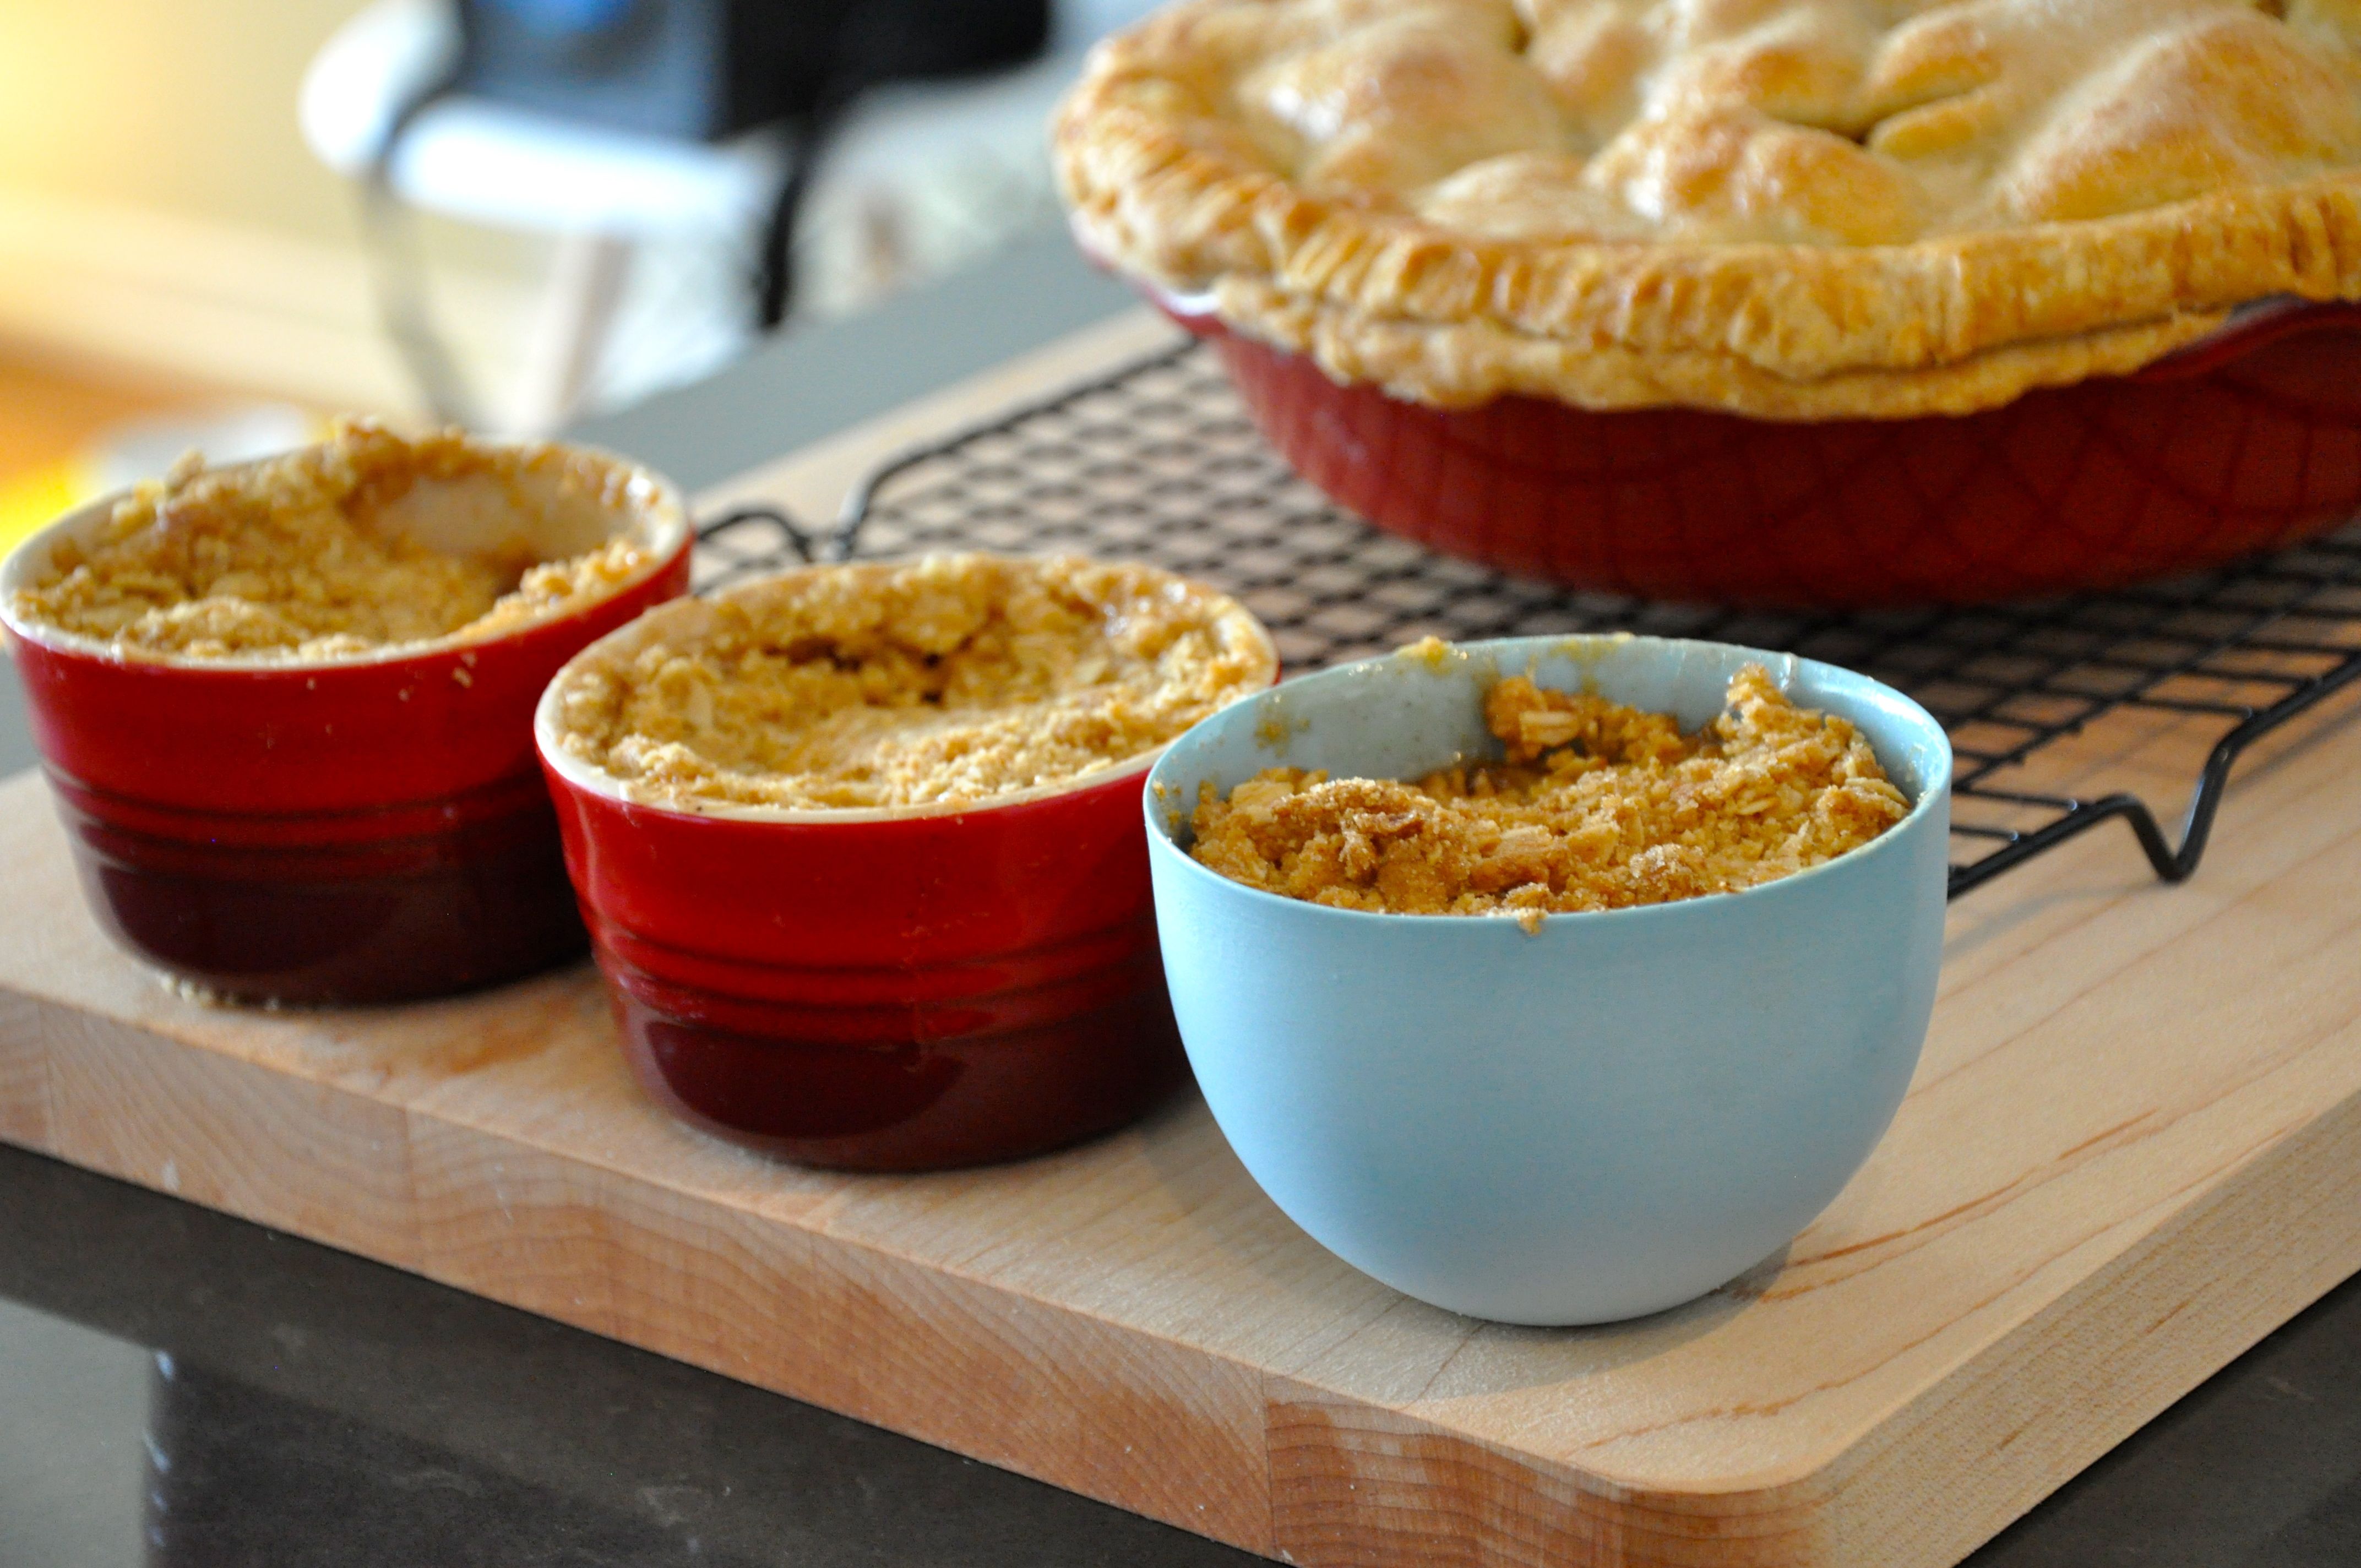
I went to the farm with a mini-mission in mind of actually using the apples I picked at the farm to bake apple related products at home. I was having a tough time deciding between an Apple Pie and an Apple Crisp so I decided, why not experiment and try to make both using the same filling recipe? That’s exactly what I did. My thinking was that these pie recipes always call for way more filling than what I can actually fit in the pie. Here is a photo of last years pie attempt with ALL the filling. Now thatsa biga pie! So I figured, use the excess filling to make mini crisps.

The pie you see pictured above was baked using the deep dish apple pie recipe of Ina Garten. It was an amazing looking pie and the pie crust itself was delicious. But to be honest, the filling was a little too citrusy for me. So I decided that this year I’d try baking apple pie with this recipe that I found on smittenkitchen.com.
I prepared the pastry


I prepared the filling. No stickers to peel off for the McIntosh apples. Whoa. That’s weird. Ok, I cheated a little and had to supplement the recipe with some granny smith apples bought at the grocery store. Don’t judge me!


I put it all together and baked the pie

While the pie was baking I moved onto the crisps (they needed a little less baking time)
I found a bunch of fruit crisp recipes from Ina Garten. One thing I noticed was that every single one of those recipes used the same ingredients for the crisp topping. So I decided to halve the amounts listed for the toppings (remember it was just mini crisps with leftover filling) and use that for the crisps.
Voila! Pies and Crisps!

The verdict
The pie filling was perfect. Apply and spicy with a hint of citrus. The pie crust was ok but not great. I made a few mistakes in preparing the pie crust (recipe was a little too fiddly for me!) so that may have been my fault. The crisps were the real winner of the day. Everything was perfect about them and that topping was yum yum yum!
So next time (and that’s what I’ve put down as the recipe) I would combine two recipes for creation of the pie. I’d use Ina’s recipes for perfect pie crust and crisp toppings but the smittenkitchen recipe for the pie and crisp fillings.
The recipe
Follow these instructions to make perfect pie crust plus prepare egg wash (1 egg beaten with 1 tablespoon water for egg wash)
Pie Filling Ingredients:
- 1.5 pounds Granny Smith apples (3 medium)
- 2 pounds McIntosh apples (4 large)
- 1 tablespoon juice and 1 teaspoon zest from 1 lemon
- 3/4 cups (5.25 ounces)
- 2 tablespoons all-purpose flour
- 1/4 teaspoon salt
- 1 teaspoon cinnamon
- 1/4 teaspoon ground nutmeg
- 1/4 teaspoon ground allspice
Apple Crisp Topping Ingredients (enough for about 4 mini apple crisps) – adapted from this Barefoot Contessa Recipe:
- 3/4 cups all-purpose flour
- 6 tablespoons granulated sugar
- 6 tablespoons light brown sugar, lightly packed
- 1/4 teaspoon kosher salt
- 1/2 cup old-fashioned oatmeal
- 1/4 pound (1 stick) cold unsalted butter, diced
Pie Filling Directions:
- Peel, core and cut apples in half, and in half again width-wise; cut quarters into 1/4-inch slices and toss with lemon juice and zest.
- In a medium bowl, mix 3/4 cup sugar, flour, salt and spices.
- Toss dry ingredients with apples.
Apple Crisp Topping Directions:
- Combine the flour, sugars, salt, oatmeal, and cold butter in the bowl of an electric mixer fitted with a paddle attachment.
- Mix on low speed for 1 to 2 minutes, or until the mixture is in large crumbles.
Pie & Crisp Assembly & Baking Directions:
- Preheat the oven to 400 degrees F.
- Roll out half the pie dough and drape it over a 9- or 10-inch pie pan to extend about 1/2-inch over the rim. Don’t stretch the dough; if it’s too small, just put it back on the board and re-roll it.
- Fill the pie shell with the apple mixture.
- Fill 3-4 ramekins with remaining apple mixture.
- Brush the edge of the bottom pie crust with the egg wash so the top crust will adhere. Top with the second crust and trim the edges to about 1-inch over the rim. Tuck the edge of the top crust under the edge of the bottom crust and crimp the 2 together with your fingers or a fork. Brush the entire top crust with the egg wash, sprinkle with 1 teaspoon sugar, and cut 4 or 5 slits.
- Sprinkle crisp topping evenly over the fruit in the ramekins, covering the fruit completely.
- Place the pie on a sheet pan and bake for 1 to 1 1/4 hours, or until the crust is browned and the juices begin to bubble out. Serve warm.
- About 15 minutes into baking add the ramekins onto the sheet pan and bake for the remaining hour until the top is brown and the fruit is bubbly.

Pingback: Thanksgivukkah Recap | eatyeats